|
Cart & Wagon Dogs
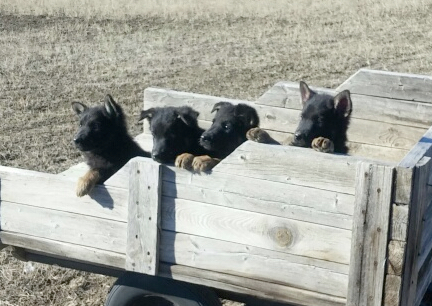
The first thing I ever had a dog pull, headed toward my dream of a Three German Shepherd Dog (GSD or GSDs) Team, was Tamar, my first GSD, pulling a small cart made from a child's wagon trailer with the tongue cut off and shafts welded to it. I was sooooo proud of my dog and cart! That is also when I started making my own harnesses for dogs. Later I designed a Multi-Purpose Harness for dogs that had a better neck collar than the "D" type, that a person could use with a boat in the water with a quick release up on top of the harness, and one that could be used for everything but a cart. A Cart, two wheeled vehicle, needs a more stable, more straps, type of harness.
I mention harnesses because for a dog to safely pull a cart or wagon, they need the right type of well/correct fitting harness, the type for the job. One harness is not the same as another.
Tamar pulled that little cart many miles. She learned her Sled Dog Commands pulling that little cart. My kids all rode behind her and had fun doing it. I have said before on other pages. I did not have a lot of photos of my first Three German Shepherd Dogs and those that I did, were ruined, destroyed in black mold in N WI. I soooo wish I had those photos to hold and to show off.
That same little Red Cart, taught a lot of dogs to pull in shafts, in harness.
GSDs, with the hip problems they can have, should be trained and conditioned well before adding heavy weights or long trips for the dog to pull. Start with an empty load, and pull only a short way. Do this over many days before moving on to having your dog help around the farm bringing in loads of firewood.
GSDs LOVE to learn to work in harness. My dogs all got/get excited when I get out the harnesses and other equipment.
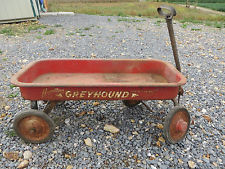
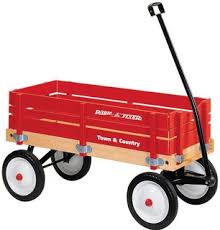
The wagon you choose to use for your dog to pull does not have to cost a fortune or be fancy or even brand new. You might even have an older wagon in your own garage you could convert. If not, ask friends, you might go shopping at neighborhood Garage Sales.
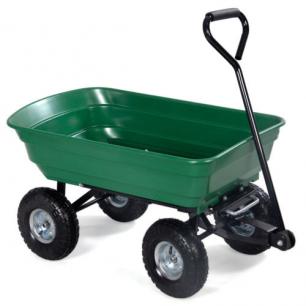
If you can not find one used, try a Hardware Store and buy one of those nicely made Garden Wagons. These are very popular for dogs to pull, and they can hold a good load. Our Saint Bernard pulled heavy loads in the Garden Wagon we bought and converted
BUT! The wagon DOES need to be in Good Repair. It needs to be converted, that is taking the handle off and adding shafts. Safety First
PLEASE NOTE:
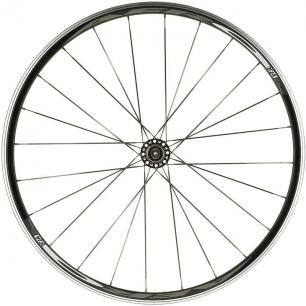
Average Bicycle Wheels that are made for a child's bike, and many cheaper adult sized Bicycles, are not strong enough to carry the average adult in a Dog/Animal Cart. More than once the tires have collapsed under heavier folks, or heavier loads, the wheels will break. Buy the correct wheels for your cart or wagon if you are going to be building one for you to ride in behind your dogs/animals. Buy heavy duty, higher weigh limit, wheels for your animal vehicles.
PVC might not be the best choice for making your Dog/Animal vehicle. How much weight will you be adding to the vehicle? What Terrain will your dog(s) be pulling on? Be sure that if you are building a vehicle for your animals to pull, you make it strong enough for the job at hand.
Make sure the shafts on your dog vehicle are long enough for the dog to take a full stride. You do not want the dog up against the vehicle and getting hit in the back of the legs or feet as it pulls.
Be honest about your own weight. Do you actually need two or three dogs to pull you and a heavy weight cart?
AND! NEVER, EVER! DO NOT! NEVER HAVE YOUR DOG PULL A WAGON OR OTHER VEHICLE BY IT'S COLLAR. This is very dangerous and could crush your dog's tracheal (wind pipe). Also, NEVER have your dog pull a wagon with the handle or by the handle. The handle can and often does come up and hit the dog in the rear. Not only could this really hurt and or scare your dog, you will ruin the dog from ever wanting to pull again. When using the handle, a wagon is far more likely to tip over too.
YOU ALONE ARE RESPONSIBLE FOR YOUR OWN AND YOUR DOG'S SAFETY WHEN TRAINING AND WORKING WITH YOUR DOG. WHILE WE GIVE IDEAS AND INFORMATION ON TRAINING AND HOW YOU MIGHT, WE ARE NOT THERE WITH YOU. WE DO NOT KNOW YOU OR YOUR DOG. WE CAN NOT SEE JUST HOW YOU ARE TRAINING. WE ARE NOT, WILL NOT BE HELD, RESPONSIBLE FOR YOU OR YOUR DOG. YOU ALONE SHOULD KEEP YOUR OWN AND YOUR DOG'S SAFETY AND HEALTH ABOVE ALL. YOUR DOG COUNTS ON YOU, DON'T LET IT DOWN!
PLEASE BE SAFE AND USE THE CORRECT EQUIPMENT IN GOOD REPAIR WHEN WORKING YOUR DOG! Teaching Your Dog To Pull A Wagon
Copyright 2003, Marna Kazmaier
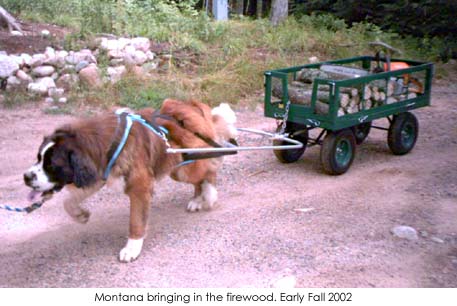 When teaching your dog to pull a wagon you need to start with the right equipment. I use one of the following three types of harnesses on the dog. 1) A harness that I designed that has a siwash front, cart type harness that ends half way down the dogs torso with a snap up on top for quick release. I call it a Multipurpose or Cart Harness. This harness has "rings" on each side that hook into the shafts of the wagon. 2) A modified freight or weigh pull harness that has rings on each sides. The front of the wagon, usually by chain is hooked to the back of this harness, each side of the harness has rings that are hooked to the wagon shafts. 3) A "D" harness. This is the same type of harness that people walk dogs with, only the type that I use are from 1" to 2" wide and padded with polar fleece, lambs skin or fake fur fleece. It also has metal rings sewn in on each side. The last harness mentioned is my least favorite of the three, but as I always say, whatever safely works for you. Also needed is a wagon in good repair and the right size for you dog. A wagon too large for your dog will be too heavy and overwhelming for the dog; a wagon that is too small for the dog will be too light weight and look bad on the dog. When teaching your dog to pull a wagon you need to start with the right equipment. I use one of the following three types of harnesses on the dog. 1) A harness that I designed that has a siwash front, cart type harness that ends half way down the dogs torso with a snap up on top for quick release. I call it a Multipurpose or Cart Harness. This harness has "rings" on each side that hook into the shafts of the wagon. 2) A modified freight or weigh pull harness that has rings on each sides. The front of the wagon, usually by chain is hooked to the back of this harness, each side of the harness has rings that are hooked to the wagon shafts. 3) A "D" harness. This is the same type of harness that people walk dogs with, only the type that I use are from 1" to 2" wide and padded with polar fleece, lambs skin or fake fur fleece. It also has metal rings sewn in on each side. The last harness mentioned is my least favorite of the three, but as I always say, whatever safely works for you. Also needed is a wagon in good repair and the right size for you dog. A wagon too large for your dog will be too heavy and overwhelming for the dog; a wagon that is too small for the dog will be too light weight and look bad on the dog.
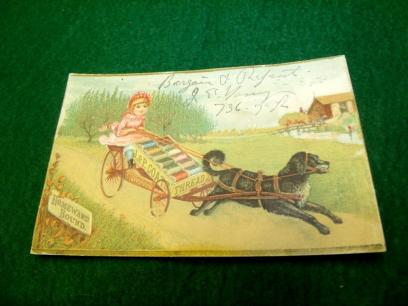
Any type of harness that you choose to use to teach your dog to pull a wagon or a vehicle with shafts must have rings or loops on each side of the harness. The rings, when attached to the sides of your wagon, become your "brakes" when stopping and also "slow the load" on down hills. The rings on the harness of the dog hooked to the shafts also become the steering for your wagon.
A recreational or an x-back harness will not be safe for this type of pulling, as this type of harness would "pull" forward when the dog stopped. This will cause the harness to either pull up on the dog or come completely off the dog, it will also allow the wagon to hit the dog in the rear.
Make sure that the wagon you are using is in good repair. Check the axles and the tires to make sure everything is working properly. Check to make sure that the "tub" is safely attached to the frame. If you are thinking of painting the wagon, now (before you convert it for your dog) would be the best and easiest time to do it.
The wagon should be modified with shafts. Take the handle off the front of the wagon and add a "U" shaped device that will fit around your dog...you can bend 1/2" or larger conduit for this, or make it out of PVC piping or wood. At the end of the "U" shaped device, now called shafts, about 3" in toward the wagon add snaps. These are what you hook into the rings on the dog's harness.
After you have your wagon ready, and a good fitting harness for pulling, put the harness on the dog and attach a leash on the dog's collar. With the dog leash in one hand and the wagon in YOUR other hand go for a walk. In other words DO NOT HOOK THE DOG TO THE WAGON for your first couple of times out. This will allow the dog to see and hear the wagon and not be spooked while tied into it in harness. If this goes well do it again the same way the next day.
After a couple of walks or as many walks like this as it takes until your dog does not care about the wagon, hook the dog into the wagon shafts. DO NOT ADD A CHILD to the wagon!! Take the dog for a short walk, MAKE A BIG DEAL out of the dog pulling and encourage the dog with treats and verbal praise as you walk along. After a few good walks like this you could then add a small child or a light load. If your dog will be hauling firewood or the like, you will want to increase the dog?s load slowly over several days or weeks. Let the dog muscle up for the work. It would be very discouraging for the dog for you to add a huge and hard to pull load the first few times (or days) the dog came out to work for you.
Now the fun begins, start buying and making decorations for parades in your home town! Before you enter your dog in a Parade, take your dog to a couple of Parades as a spectator. Let is see the bands, the horses, and all the excitement.
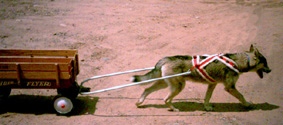 Some people do hook their dogs to wagons with the handle still attached to it with a recreational harness, BUT! this is not safe for your dog or for your legs, WHAT EVER YOU DO NOT LET THE WAGON (or any load) HIT THE DOG IN THE REAR!! Going downhill with this set up is going to be a problem, you need someone in the wagon to drag their feet down hill so that the wagon does not hit the dog (the dragging noise will probably scare the dog). You could have another adult in the rear of the wagon with a rope tied around the rear axle to hold the wagon back. The shafts on the wagon are the best way to train and have a dog to pull a wagon. Some people do hook their dogs to wagons with the handle still attached to it with a recreational harness, BUT! this is not safe for your dog or for your legs, WHAT EVER YOU DO NOT LET THE WAGON (or any load) HIT THE DOG IN THE REAR!! Going downhill with this set up is going to be a problem, you need someone in the wagon to drag their feet down hill so that the wagon does not hit the dog (the dragging noise will probably scare the dog). You could have another adult in the rear of the wagon with a rope tied around the rear axle to hold the wagon back. The shafts on the wagon are the best way to train and have a dog to pull a wagon.
A few inexpensive places to look for a child?s wagon... Do you have a wagon in your own garage that your own child has outgrown? Do you know someone who might have a wagon that their child has outgrown? You may also want to check neighborhood garage sales and thrift shops in your area. Antique stores usually have some pretty KOOOL wagon's in BIG dog size, but expect to pay more then the wagon is probably worth, and be prepared to do some or even a bunch of repairs to an older wagon.
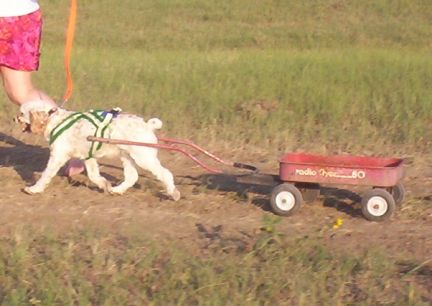
I can only tell you what has worked for my husband Deron and I training not only several of our own dogs to pull wagons and carts, but teaching other's dogs as well. We have trained SEVERAL different breeds of dogs and this method works for all the breeds we have trained. All the dogs in the photos on this site are our dogs (past and present). The photo to the right is of Frankie, a one year old Cocker Spaniel in training, this was his fourth section with the wagon.
I CAN NOT be held responsible for any accidents or injuries you and or your dog may occur as you train. Each dog and trainer are different. Be safe, be fair, take it slow and make it fun for the dog.
MAKING METAL SHAFTS FOR A DOG'S WAGON
copyright 2005
Most of us can come up with a wagon for our dog to pull. I have found that for an large sized GSD a wagon from the Hardware Store is a great buy. The ones I like are the expanded metal wagons with nematic wheels that has sides that come off or fold down. The bed of this type wagon is approx. 2' x 4', large and strong enough for adult to ride in comfortably (yes, a large adult). This type of wagon sells for less then $100 and is very easy to convert for dogs to pull. They are built tough and will last a lifetime if well cared for.
Wagons can also be found at Garage Sales, Flea Markets, Thrift Stores and your own garage. Or ask a friend with older children and they may just give you one that their children outgrew.
There is the problem of shafts, you can't just buy those anywhere. You can buy them from some dog and suppliers, but in my opinion the shipping alone is enough to make you shutter.
There are many ways you can make your own shafts for a dog wagon. They can be made out of wood, PVC pipe, plumbing pipes, or other clever materials. I like to make ours out of 1/2" metal conduit that is 10' long. I say "I like to make", when I really mean "supervise" my husband making the shafts.
The conduit shafts that I use are actually all one piece. This makes it strong and easy to store. The shafts each have a dog leash snap bolted in from the front toward the wagon at approx. 12" that the dog will be hooked into. The shaft system is easily hooked to the wagon with a 3" cotter pin. Your dog will pull forward with the shafts and the s butt strap becomes the brake for the wagon when hooked into the wagon correctly and with not too much slack.
To make metal shafts for your wagon you will need:
10' metal conduit
one small 1/2" plumbers T piece
one small 1/2" plumbers T that will fit into where your wagon handle come out of
connector for the two T pieces so that they fit together back to back
one 3" cotters pin
two 2" eye bolts
two nuts to fit bolts
1/2 washers with middle to fit bolts
two 3" dog leash snaps (we use brass with the spring opening
Good Humor
something to bend the conduit with like a tree or conduit bender
two 1/2 corks or plastic chair railcovers
Electric drill
pliers
screw driver
Optional:
conduit bender
1 - 2 foot of dog chain new or in good repair
two 3" dog leash snaps (again, we use brass with spring opening)
one small eye bolt with nut to fit it
Mark the 10' metal conduit in the middle with a permanent marker then mark it approx 6" - 8" on either side of the middle mark. Slide a metal 1/2" small plumbing T unto the conduit before bending the shafts into place. Either bend the conduit with a conduit bender or wrap it around a tree. You do not have to use a fat tree, just bend one side at a time. Bend so that the shafts are even at the ends. If they do not come out quite even you can use a hack saw to "make it so".
Mark each side of your shafts in from the front (the open end) at 12" and drill a hole in the conduit so that a snap can be added in an upright position. If you have a long bodied goat or dog make your holes closer to the end so that the animal has rear leg reach. Drill the holes and place a washer on each side under the eye bolt. Fasten the nut and tighten down. Open the end of the eye bolt (just a bit) and add snap. Close eye bolt.
Your second T piece will somehow have to be connected to the first T piece. In our case we used a T connector. Because I am not sure what size second T you will need to fit your wagon I can not spell this part out for you.
The back side of the second T, or the top of the T fits into your wagon where the handle comes out and is connected to your wagon with a cotter pen. The cotter pen will make it easy for storage or travel so that you can remove the shafts quickly. We carry an extra cotter pen with us....just in case.
Place corks into or plastic covers on each end of conduit shaft. This will save your legs from gashes when training.
Drill the T and conduit in the center of the back part of the U in the middle. Open this eye bolt and add one of the remaining two dog leash snaps. Close eye bolt. Now on one end of your chain add the other dog leash snap. When using the wagon for your dog add the chain to the snap that is hanging from the T. Now clip the other end of the chain with the other snap to the back of the dogs harness. The chain gives you adjustability so that different sized dogs can use the wagon correctly. NEVER use a Recreational or X-Back harness on a dog with a wagon.
If you do not convert the wagon shafts for a dog you will still need the eye bolt or bolt to hold the shafts in place on the T piece.
When you remove the handle from your wagon save it!! You never know when you might need it for something. Put your bolt and nut back into the handle so that you will know right where it is when you go for the handle. With using the cotter pen to attach your dog shafts it only takes a minute for change over.
This is what has worked for us. We can not be held responsible for anyone else's workmanship. PLEASE make sure everything is tightened down securely before adding your animals into the shafts to pull. We also can not be held responsible for your animals ability, training or safety.
MAKING A SIMPLE AND FREE (of cost) INDIAN TYPE TRAVOIS
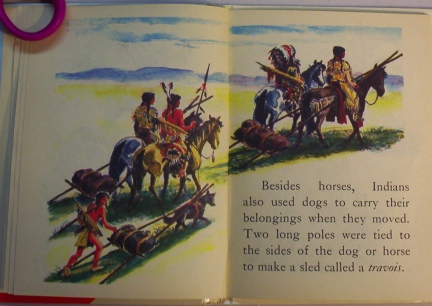
If you are so inclined you might build this Travois for training your dog to pull. You will be able to build the Travois for no or very low cost. It might be a good item to start your dog pulling.
To make a very simple (and basically cost free) Travois for your dog to pull.....Cut two long branches or small trees about 5'- 7' long and one about 2' and another 3' long. Use paracord or rope to tie the two longer branches together in and "A" shape with the top of A crossed over in a small "X". Use the 3' piece for the cross piece in the A and add the 2' piece just above the 3' piece. You tie your load into a blanket and lash in between the two cross pieces... you now have an Indian Travois. You could also basket weave the area of cargo with cord or rope.
Do NOT hook to the dog's collar for pulling. Hook the top X of the Travios to your dog's X in it's, either, Recreational, X-Back, or Multipurpose Harness.
When first training your dog to pull this type of Travois, have one person walk the dog with a leash and another to walk beside it, this will keep the dog walking straight, and the person next to the Travios, can hold it if the dog starts to turn circles or is acting up.
My own Dog Travois we made out of 1" x 2" x 8' boards with five 1" dowels cut to 12" pieces as cross bars at the bottom of the Travois. We also wove 3/4" Rope back and forth to make an area for cargo. I added two snaps to either side of the Travois to hook into my Multipurpose Harness for quick and easy attachment to the dog. The Multipurpose Harness offers the correct way for a dog to pull weight with chest padding. It may not have looked like the "Traditional Taviois" that have been used for centuries on horses and dogs, but it worked great and was a Favorite when my dogs pulled it in Parades.
ENTERING YOUR DOG, PULLING A WAGON, IN A PARADE OR OTHER EVENT
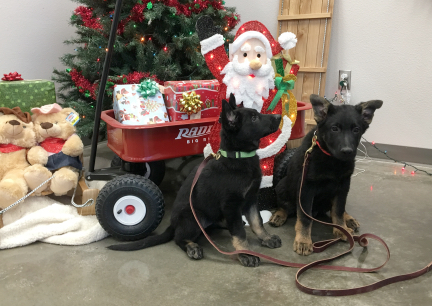
Before you enter in a Parade or other event with your dog pulling a wagon, there may be a couple of things you need to know.
First of all, what a dog does well at home it may or may not do well out in public and remember the excitement, noise and atmosphere at a parade or event. There is much going on, there will be many animals (some your dog may have never seen before), and the loud loud music, sirens and people.
Many of us have been to watch a parade and thought, "Boy, I would love to be in the parade with my dog". Being in a parade with your dog is fun, exciting and requires a certain amount of PATIENCE, some times an over abundance of patience.
You don't just get up the morning of the parade and go join in the line up. The first thing you must do is prepared the dog. If you dog lives in the City or County this will help. I live in the country now, and **might** get four cars on our Road a day (I love it) but the dogs do not get much socialization, and cars in the nearby town worry some of them. You may be laughing at this but remember, most of you don't have horses and/or marching band coming by your houses either. My dogs on the other hand are used to the horses and loud music......let's just say I like the music "pumped up" loud in the truck. I am an old Rock and Roller.
Photo of our Tabaliah and Tychicus sitting in a busy Christmas Shopping Store Doorway, 9 weeks and 12 weeks old, learning to 'Sit', 'Stay'.
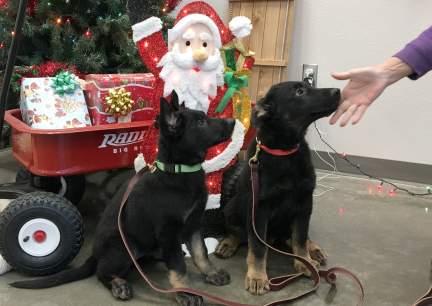
So, now you get my point.....there is A LOT in a parade that a dog must see and hear before entering and being freaked out by it....no one wants to see a scared, cowering dog walking IN a parade.
Not only do you need to get the dog used to the sounds and sites around it, but lots and lots of loud people, as well as the "get up" that the dog will be "wearing"....backpack, cart, wagon, clothes, hats......
The best thing to do, I believe, is to TAKE your dog to a couple of parades and try to get a front row seat. Let the dog have fun, and DON'T let the dog bark at ANY entry in the parade you are attending. Stay calm with the dog and keep the dog calm.
Take treats and water for distraction and for rewards. We also let our dog have a couple of well chosen pieces of candy that was thrown from the parade. Don't let strange people pet your dog if your dog is uptight about the parade. (you can interpret "strange people" for yourselves).
By taking your dog out to train, away from your home, you will also know ahead of time know if everything (wagons, rig, scooter, ect) will fit in your vehicle.
Photo of Tabaliah and Tychicus out Christmas Shopping working on 'sit'/'stay' with people all around.
Make sure your dog is comfortable wearing, pulling, pushing or whatever you are going to have the dog do in the parade. Take whatever it is your dog is going to be doing in the parade to a crowed park and practice, not just once, several times over several days long before the parade day. Don't forget treats, poop bags and water.
When you call the Parade Committee about joining in the march, tell them you have a dog, or a dog group, and ask them not to place you directly behind horses or directly in front of Marching bands...remind them of a dogs acute hearing. You also want to tell them before they tell you, that you will be carrying poop bags to pick up after your dogs.
The day of the parade now fast is approaching. Get all your things together. You will need a leash, training collar, water, bowl, treats, a copy of your rabies vaccine registration, and don't forget to wear comfortable shoes and nice or silly clothes. I'm am sure you have seen people in parades and you wonder "What were they thinking?" Here they have this beautiful dog, groomed to the teeth, spotless carts, backpacks, wagons, whatever....and the person looks like sh.....well you know. Not groomed, dirty clothes.... Not only do you worry about how the dog and vehicle looks, and this may mean a new paint job on that rig, but also yourselves. Comfortable clothes a must....barn clothes a no no!! Dress to the theme of the parade. Some parades require paper work to be carried, or numbers to be worn....don't forget that either.
Decorating your dog, wagon, rig, ect to the theme of the Parade is half the fun......but be careful. Don't use glass Christmas Ornaments, if they would come apart, or drop off your vehicle and break on the ground your dog or another animal might cut their foot or eat it. If you decide you want bells on your dog's harness, sewing them on with thread will NOT hold them on your harness, they will fall off as you are walking along with the dog. Use dental floss and sew around the bell many times. Recheck your bells each time you use it. Weaving the bells into the webbing is best. Be careful putting anything on your dog that might spook the dog, and just like the item being pulled, you need a practice run with your decor too. One more thing.....poop bags in your pocket. Take at least two more then you think you might need...trust me on this one.
If you are walking with a dog club you will want to make or have a Club Banner made with the club name and maybe a phone number or website address. You also may want to make up fliers or business cards with club information to hand out to folks (and there will be some) that are interested in joining your group......nice way to literally pick up members, ey?
The more organized and professional you look the more likely you will be invited back to participate in this and other Parades. Many times there are prizes for best Parade Entrant.
If you do decide to hand out candy or dog treats to the "watchers", be VERY aware of what your dog is seeing at his view at your knee high surroundings. Walking up to strange dogs with your dog in custom or pulling a wagon, ect, is really NOT a good idea. A fight could erupt. Also watch children walking up to the blind side of your dog....children can be in your dogs face FASSSSST!! Even the calmest of dogs are stressed under Parade conditions, you will be held legally responsible for any action your dog takes.
A warning on training collars: We live in a strange world where folks (read peta) does not like to see a dog working. If you own a short haired dog (any dog really) try to train your dog to wear a nylon webbing slip training collar. I know and you know that a choke or pinch collar is not going to hurt the dog (in the right hands) but the public is a funny group.....why start trouble. Besides, we want to keep our dogs marching in parades and if someone complains to the Town Chairperson about the "torture item used on the dogs they saw in the Parade" the town may well want to head off trouble and will buckle to the idiots. If you must use a pinch collar, put a larger then normal, not longer, just thicker, bandanna over it.
All of this articles facts hold true for a person taking their dog to schools, churches, ect for demos or visits too or really, any time you are out in public with your dog.....you represent us all.
One more thing; Horse poop......dogs love it, try to walk around it and/or be ready to correct your dog. Because yes, even the most sophisticated of the dogs, the best dressed, and the very well trained titled dog....will eat it, right their in front of the whole town <grin> thus, the training collar.
ABOUT DOG HARNESSES
YOU MUST USE THE CORRECT HARNESS FOR THE JOB THE DOG IS PREFORMING AND THE HARNESS MUST FIT THE DOG CORRECTLY. 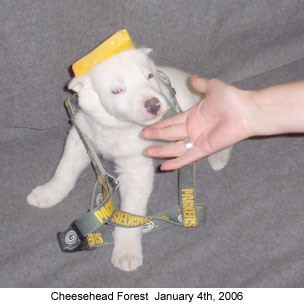
I get harness questions all the time. The main thing I am asked is why a dog can not use an X-Back harness for their dog to pull a wagon with the tongue of the wagon. The X-Back harness will come up on the dog, and might in fact come over the dogs head and off the dog, when the wagon is going down hill or the dog stops. Wagons need shafts for brakes, but even with shafts, the X-Back harness will slip up and probably over the dogs head when the dog stops or going down hill.
No, you can not use your X-Back on your dog for it to pull a wagon or a child's sled. No, that harness you had for your Siberian Husky is not going to work for your Pit Bull or Saint Bernard or Cocker Spaniel.
I get these questions all the time....mostly people want an "inexpensive harness that will work for anything the dog might pull". Guess what? Inexpensive is relative and there are no cheap ways to keep your dog safe while you have a bit of fun. AGAIN, YOU NEED THE CORRECT HARNESS FOR THE JOB YOU WOULD LIKE FOR THE DOG TO DO AND IT NEEDS TO FIT THE DOG CORRECTLY.
Harnesses for any animal cost real money. The reason is that they are usually made well with good grade materials and take time to make.
Using the wrong harness and or the wrong equipment can not only get your dog injured, but you might just get hurt too.
Siwash or Recreational Harness
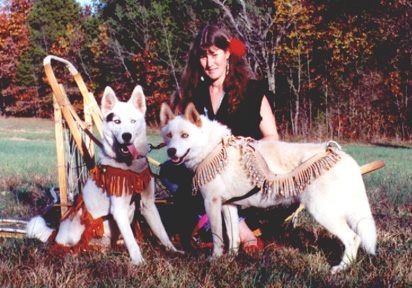
The Siwash Harness is probably the oldest style know to man. Eskimos have used these for mannnnnnnnnny years, probably 1000s of years, and they are still being used for a reason. They are WONDERFUL HARNESSES, they work well, last long, are easy to use on the dogs, easy to wash and store, and look good on the dogs.
These are used for sleds, rigs, scooters, a person in skates being pulled by a dog, and the like.
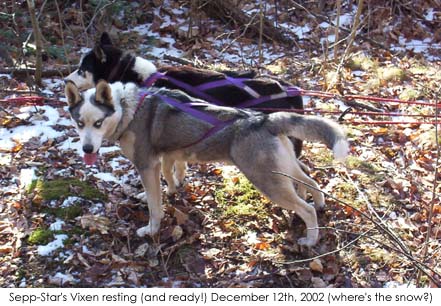
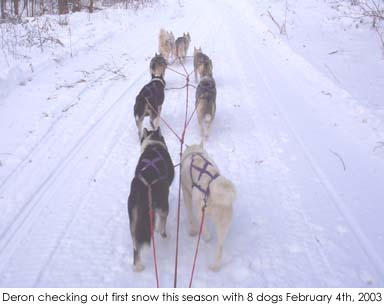
The X-Back Harness is really a Siwash Harness with an X on the dog's back that makes the harness fit a bit better. It takes the Siwash Harness that in sizing could be compared to a woman' pants, in sizes Large, Medium and Small, and makes it more, with the X-Back, of a size, like a size 10 or 12 or whatever.
The uses are the same as a Siwash Harness, the padding is the same, it is the same harness with an X on the back.


There is a difference between a Weight Pull Harness and a Freight Harness. Although they are made the same, Weight Pull Harnesses have double padding around the neck. If you are weight pulling and want to win, get a double padded Weight Pull Harness. Personally, I like the Weight Pull Harnesses for working around the farm too.
A Weight Pull or Freight Harness is used for pulling weight in competition, pulling a sled (only if well trained, untrained dogs can really get hung up in the back area of the harness), if it is converted (pieces added) you can also have your dog pull a vehicle with shafts, but the back bar also needs to be hooked into the vehicle being pulled.

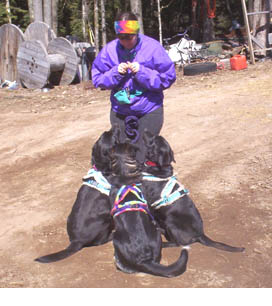
I designed this multipurpose harness for my Labrador Retrievers years ago when I first got my sacco cart. I was so excited about getting a ride in my sacco cart. I put a "D" harnesses on each of the two dogs and told them to go... they both "stepped out" of their "D" harnesses and there I sat in the sacco cart with the harnesses dangling while the dogs ran off. They did come right back when I whistled, but I knew these D Harnesses were not going to work.
I had been a Sled Dog Harness Maker for several years, so it was time to design. They say that necessity is the mother of invention and so I went to the sewing machine with an idea. Not only can you use this type of harness for sled, rigs, carts, wagons, and travios, but also for dogs to pull you in a boat, on a scooter, or on skis or skates. Truly a Multipurpose Harness. It has one "ring" on top, and two sets of two for easy hook up to what ever your dog will be pulling.
The snap is on the top of this harness so when the dog is in water, if caught in a tangle, you can free the dog in an instant. This harness is usually completely padded with double padding under the snap.
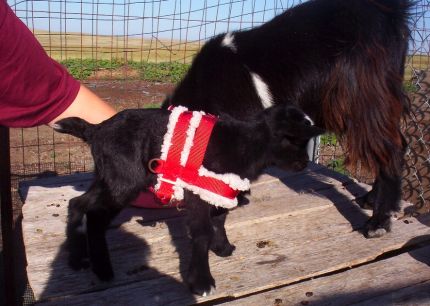
Yes, the photo is of a goat. I could not find one of our dogs using one. I have not used this type of harness for dogs or goats in maaaaany years. It is a good harness for teaching your animals to wear a harness.
These harnesses are modeled after the old style walking harnesses.
This type of harness can be used for wagons, travois or any vehicle with shafts on both sides of the animal.
MATERIALS THAT DOG HARNESSES ARE MADE WITH 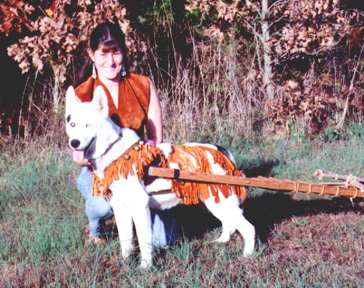

Most, if not all, sled dog harnesses today are made with either a poly pro or nylon webbing. There is a reason for that. Leather is nice, however, it will stretch, especially when wet, and your dogs might just eat it. Cotton, when wet, stays wet for a long time. Nylon and or poly webbing is not only strong, it is non absorbent so that it will dry quickly if it gets wet holding the size it was when made.
I remember when I first started making harnesses the padding was made with Fake Fur. Now the best stuff to use is a good grade Polar Fleece. Polar Fleece is not only non absorbent, but also is easy to wipe dirt and mud off with just a wet rag. It makes good padding and a good grade will last for many years.
Most harness makers use either nylon rope or parachute cord on the back of harnesses for the hooking area called the ring. Again, great stuff, last long and cleans up well. Of course, again, non absorbent.
I have added bells, and beads and conchos and the like to harnesses for years. I do not sew them on, I "weave" them into the harness under the padding. Items sewn on to harnesses will work their way off, won't last long.
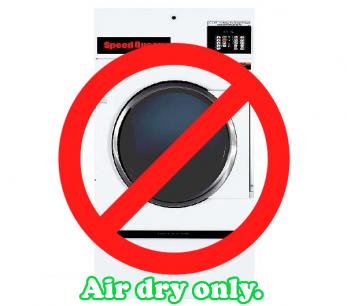
Webbing harnesses are easy to wash and look like new when finished. I wash mine in THE WASHING MACHINE with settngs on cold, warm or hot water in with a load of towels....be warned, your padding might fade. I recommend washing the harnesses on cold or warm.
DO NOT MACHINE DRY! Hang your harnesses by the loops for 24 hours. I dry mine indoors, but drying them outdoors is fine too.
If your webbing is kept clean, your harnesses will last for many years to come. Your harnesses will be longer lived then your dog....so I never recommend putting names on your harnesses.
MAKING YOUR OWN DOG HARNESS 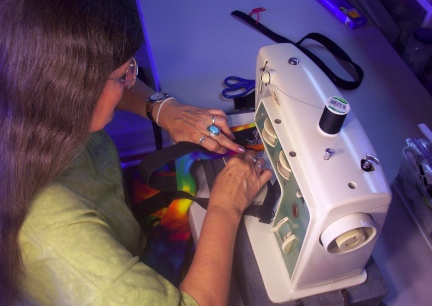
If you decide to make your own Dog Harness keep in mind that the stitches MUST be very strong. Your harness is only as strong as your sewing machines weakest sewn area. I get a kick out of "webbing strength" being used to describe harnesses, it should be "stitch strength", because the area that is most likely to break on an animal harness is where it has been sewn together. You also must use a good strength thread.
You can buy nylon webbing where you can buy fabrics and craft items. But before you buy the webbing you are looking at, double it over and decide if your home sewing machine can handle and/or pull the webbing though as it stitches. Now, keep in mind that you will have areas on the harness that not only has two or three layers of the webbing but also a doubled amount of padding too. NOW?? Can your machine handle that?
You must use a heavy duty needles. Your new needles will break the thread over and over while sewing the webbing until the needle head is "broke in". I have sanded the head of the needle to stop this, but you must remember that you DO need a needle head. If you file the needle do so a little at a time.
By the time you have bought you webbing, padding, needles (get at least a four pack because you WILL break needles), buckles, slides, metal rings, thread and whatever else needed for the type of harness you will be making, you may be spending as much as you would to just buy the harness. Price everything you need before you start buying parts. If you decide to make your own harness, prepare to be frustrated.
Making a Dog Harness will take some time, probably more of your time then you think. Not trying to scare you off, really I am not, but I have met far too many people over the years that have decided to make their own dog/goat/llama/pony harnesses that these folks have just thrown or given away the stuff they bought to make their own and bought a harness professionally crafted outright.
Now, what are you using for a pattern for your harness? It is very hard to make a correct harness by looking at a photo.
Making your own Dog and other animal equipment is fun and rewarding. If you have the time and can sew you might just save a bunch of money making your own equipment. You will be able to pick out your favorite colors right down to the snaps and or thread. You can make the item the way YOU want it to be made. You can make it a bit bigger if you have an unusually large or make it smaller for a little bitty dog. You can make matching harnesses in bright colors for each of your dogs. You can ad buttons, bows, bells, thicker padding or whatever to your item. You can also surprise a friend of yours with a nice Christmas or other Holiday gift.
I would like to invite you to join us on a Yahoo Group that I host called Working Big Dogs. -- The Working German Shepherd Dogs Team
Tue, 30 Jul 2013 13:42:16 -0400
| 


 In the high plains of South Dakota, USA
 In the high plains of South Dakota, USA